This year's Summer Garage Project was a rebuild of a bass guitar. I'm an actual drummer (actually took lessons, playing since I was ten), but I'm a fake bassist (fiddling around with one off and on since I was like 25).
There is a manufacturer called Music Man, who makes a range of basses at all price levels. I
could afford one of their sublime Bongo models, but being a bit of a hack player, I calculated that I don't deserve a $1500 bass. I could, however, justify the purchase of one of their $300 cheapo S.U.B. line of instruments, which would make a fun Summer Garage Project if I decided to tear it apart and make it resemble a Bongo.
First, here's a few pictures of a Music Man Bongo...
Some say it looks like a toilet seat. Fair enough. I don't care. I think they look terrific. Plus, all Music Man basses have some features that make them easy to tune / work with / adjust, and generally own... even their cheap ones.
So, I secured a "used" - but still wearing the factory stickers? - Music Man S.U.B. Sterling. They're commonly available for $300, but this strange used / not really used one was $200. Perfect. If I ruined it and made a total pig's ear of it, it would only be a $200 loss. Here's the patient, immediately after purchase. It's perfectly fine, if a little ho-hum...
Here's a Photoshop experiment I did to determine to what degree the Sterling could be made to resemble a Bongo by removing material...
-The two horns would need to be cut off square.
-The face would need to be contoured.
-The outline would need to be rounder.
-The pickguard (black plastic thing in the center) would come down, to be concentric with that metal knob plate. This is not characteristic of the Bongo, but the shape of the pickguard disagrees with the crescent of the control plate as it came from the factory... to my eye, at least. I'd make a new pick guard out of aluminum, with a beveled and polished edge, and a white leather face.
I wanted to do a metal flake finish, in either blue or green, depending on paint availability. More on that later.
 |
Disassembled. That bit of green tape in the middle? That's protecting the squishy foam cushion that allows you to adjust the height of the pickup by tightening or loosening some screws. Rather than rip it out and try to find a replacement ta the end of the project, I just covered it.
|
 |
| Mark up. Drawing out the areas to be cut and / or re-shaped. |
 |
| Do or die. First cut. |
 |
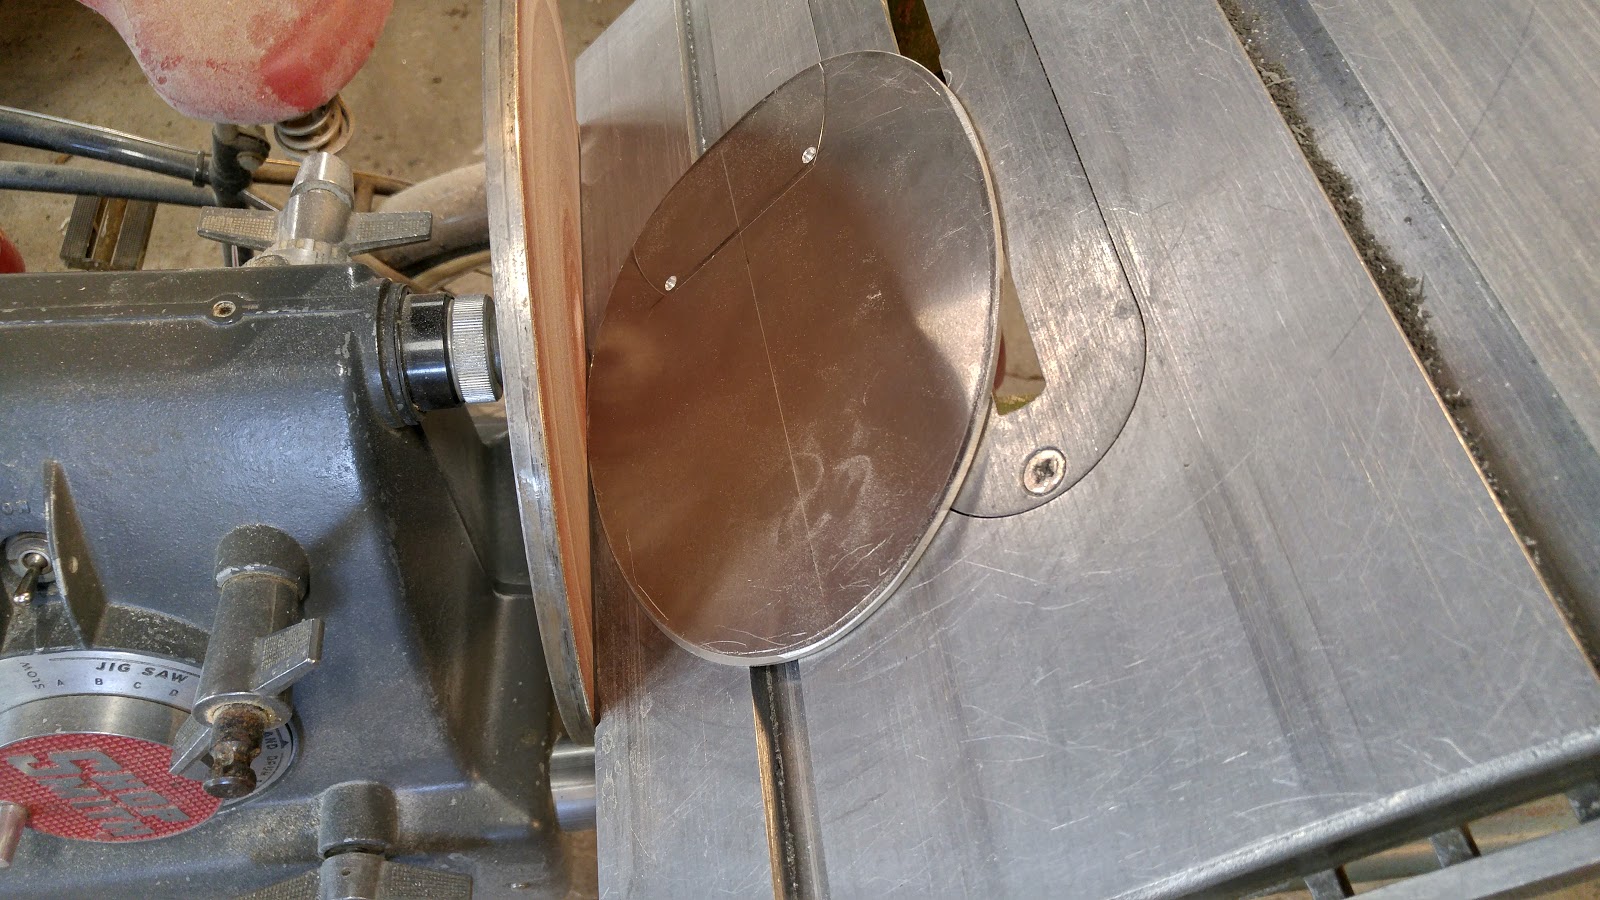
| That's a 1960-something Shopsmith. It's basically a convertible table saw / sander / drill press / wood lathe. It was my dad's. The sanding disc is about 120 grit, for removing lots of material in a hurry. Also works on knuckles. |
 |
| The interior contour was done using the Shopsmith again, but with the "flex shaft" attachment. Imagine a four-foot flexible tube with a spinning axle on the end. So, you can sit down and use a smaller spinning tool in your lap, and for way more maneuverability. You can mount various cylindrical sanding drums to that, for tricky stuff like this. You can see one in the image below. |
 |
I made a tool for working on the interior arc by hand. It's a
piece of PVC pipe with some 220 grit sandpaper stuck to it
with double-sided tape. |
 |
| The face of the Sterling is completely flat and slab-like. I broke the plane of the face and domed it as much as I could, to be like the Bongo, without fouling the mounting surface of the hardware that needed to go there, like the bridge (thing that holds the ends of the strings). On the right, I determined that the control plate (where the knobs go) could easily be bent to fit a curved surface... so long as it was a simple arc and not a compound curve (one that curves north-to-south AND east-to-west). |
 |
Shaping complete. Checking for fit and placement of the
pickguard and control plate after cutting the rough shape
of the pickguard out of a sheet of 1/4" aluminum.
|
 |
| Here's a pro tip. Aluminum comes in all different formulations, identified with numbers. I got a piece of 6061 aluminum, which is the stuff they make mountain bikes and dune buggies out of. There are tougher formulations, but 6061 is pretty strong stuff. I could have easily gotten by with some of the junkier aluminum they use for frying pans and stop signs. It would have been easier to work, and cheaper, too. This bit of metal fought me the whole way as I cut and filed it, and cost me $28 for a square foot of it. Jeez. I also could have gotten a piece half as thick, but I wanted to bevel the edge and polish it, for a nice shiny trim on the pickguard. |
 |
| If you don't have a CNC mill, here's how to cut contours by hand. Drill the corners with a bit larger than your sabre saw blade, so when you're cutting along, you can park it in a corner and do the turn. |
 |
| Probably should have cut the holes in it before beveling the edge. Oh well. |
 |
| Filing smoother. |
 |
| No, the lasers aren't cutting the material. They're just showing you where the bit is going to make contact. |
 |
| Connect the dots. |
 |
| Chewing out slots in the arc to make a comb shape, then filing down the comb. Any way to remove material that works. |
 |
| Rough filed. |
 |
| Then, sanding. |
 |
Pro tip: When clamping aluminum (yes, even the tough kind), in a vise, put it in some cardboard
so the jaws don't chew it up.
|
 |
| After sanding, over to the Shopsmith with a woven nylon wheel on it. The wheel is kind of like nylon carpet. The result is somewhere between sanding and polishing, and gives that brushed finish. |
 |
| Off with the nylon wheel, and on goes the cotton polishing wheel. |
 |
| You can't really tell how much polishing is left without checking it in daylight. |
 |
Shit. Forgot to cut the hole for the pickup. Now I have to do the exact same thing again, without
mangling the polished edge. Really should have done that last.
|
 |
| Lather, rinse repeat... |
 |
Paper pattern traced from the aluminum pickguard, then taped to the leather. Why not just trace
directly off the aluninum? Because the paper is super thin, and lets the china marker exactly follow
the edge of the paper. Tracing off the aluminum would have resulted in the leather being slightly oversized, because the thickness of the china marker wouldn't have gone all the way to where the aluminum and leather touched - but just a little wide.
|
 |
| Perfectly radiused corners are impossible to cut with a blade. Use a hole punch of matching diameter. Again, do the corners first. |
 |
| Test fit. |
 |
| How to glue leather to aluminum? Contact cement. It's similar to the stuff they use to glue shoes together, and it's the same stuff they use to glue down formica to wood when making countertops. Contact cement (rubber cement) must be applied to both surfaces and allowed to dry before mating the surfaces. Trouble is, once you do, it absolutely cannot be re-positioned. So, how do you get the leather and aluminum lined up perfectly on the first try, without the screw holes and contours being all wonky? Solution: Piece of plywood with bicycle spokes drilled into it, to act as alignment guides. This took a few days to think up and it worked like a charm. |
 |
| Cement is gooped onto thing A (the leather). The leather is floppy, so it will lie on the wood, and the aluminum will be placed onto it. |
 |
| Thing B (aluninum) is gooped with cement. Polished edge is masked off with tape. Excess glue could have been wiped off easily enough, but why not avoid that. |
 |
| Ding. Could not believe how well that worked. |
 |
| All the paint stuff, from left to right. Isopropyl alcohol for degreasing surfaces to promote adhesion. Lacquer thinner, for removing anything from anything. Spray gun set (could not justify an expensive one, so a cheap set). Primer, base coat green, intercoat clear (which will carry the metal flake), and clearcoat. |
 |
| Each medium has a spec sheet that explains how it needs to be mixed or reduced, drying time, recoat times, pot life (how long it's okay to use it while it's sitting in the gun), etc. etc. on and on. The guys at the car paint shop have it all pretty much memorized, because they do this all day long. I do not. |
 |
Back to the body. Now primed and ready to sand. You can faintly see the "orange
peel" texture I got with the primer. I don't know why this happened. I don't think
I was holding the gun too far away, which is usually what does it. I don't do this
sort of thing every day, so there was guesswork the whole time. Anyway, it was
easily fixed with more sanding. Whee. |
[The tedious primer sanding sequence has been edited out for viewer interest.]
 |
| Lime Green metallic, mixed with reducer, and ready to go in the gun. |
 |
Technically, metallic paint does have metal flakes in it, but they're really small.
When people talk about metal flake, they're usually referring to the really big
kind that you buy separate and combine with the paint yourself. |
 |
| Pros have special racks or hooks that hold a spray gun perfectly level so you can put them down without spilling the paint inside. I used a vise. |
 |
| Base coat green. There were some disasters, like when the coat hanger bent and dropped the guitar on the ground while the paint was wet. Another good one was when the strap on my respirator touched the wet paint, making another mark. Oh yeah, you need to wear a respirator when using this kind of two-part paint, to keep from poisoning yourself. Not just one of those silly dust masks like you wear when you clean the attic. A proper respirator, with activated charcoal filters and a tight rubber seal around your face. |
 |
| This is how the flakes come when you buy them. You spoon them into the clear, using a ratio of liquid to flakes that is surprisingly hard to find on the web. Everyone says "you need to experiment". This is not helpful. |
 |
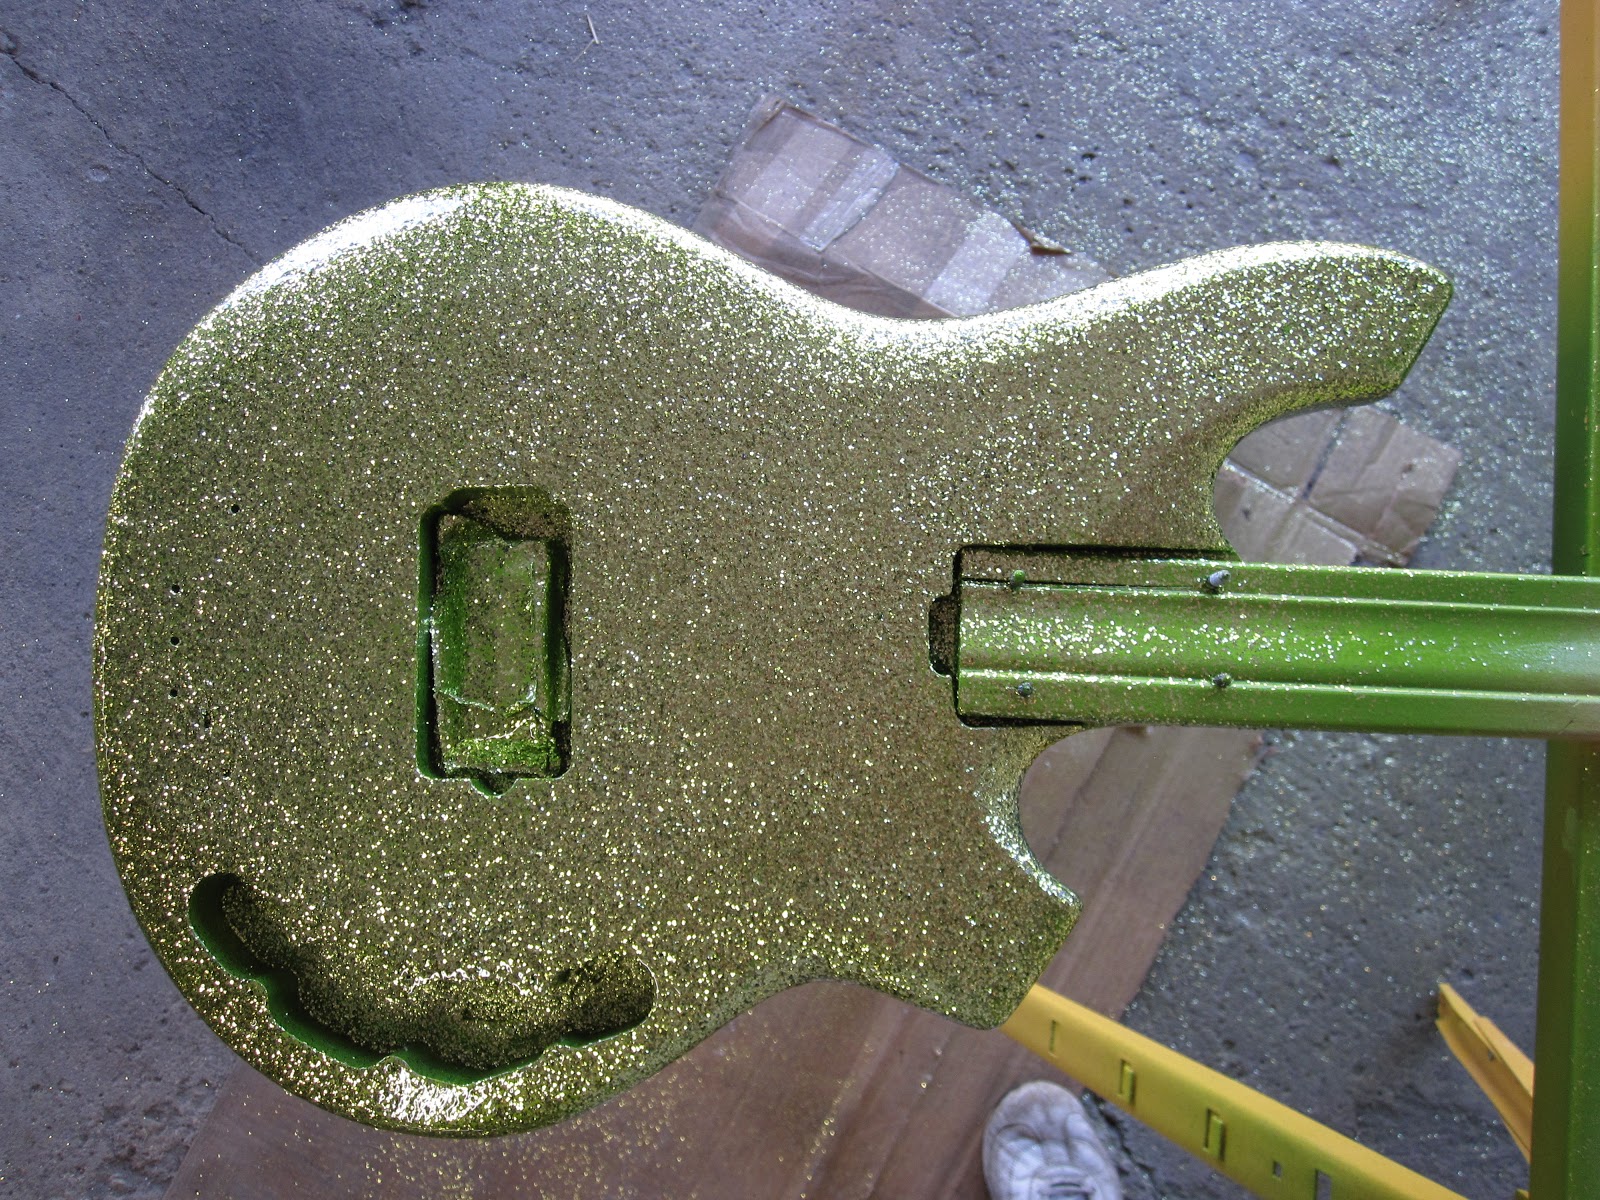
| After base coat comes the "intercoat clear", which is basically regular paint without pigment. You can tint it with color for translucent effects, or pour in metal flakes. How much flake do you pour in? Hard to find that information on the web, so I guessed. It must have been too much, because the gun was clogging like crazy. This is when the wheels started to come off the train. There should be way more flake than this pouring out. |
 |
| Flake was not going well. It wasn't "lying down" after being sprayed onto the bass, and the gun was clogging. I think the real problem was that one does not just decide to try a complicated finish like this unless you paint cars for a living and do this kind of thing all the time. Flake is not for the delitante. |
 |
| All three steps of this paint system (base, flake, and clear) are meant to be done within the same day, ideally with about fifteen minutes between coats. Once any stage of the paint is fully cured, that layer is no longer chemically receptive to the next stage. To add another layer at that point, it needs to be roughed up with sandpaper or a 3M pad, or something to give it a"tooth" - something for the new paint to mechanically hang on to. However, doing that is likely to make it look foggy or dull. With the flake "standing up", the clear wasn't covering it, and was just starting to run. Time to admit defeat for the time being and let it harden for a week (hopefully), then figure out how to salvage the project. The one thing going for me was that the finish had more than enough "tooth" for a new coat of clear to adhere to. If you weren't careful, it would take your skin clean off. Such tooth! |
 |
The paint materials alone cost about $280. Shit is expensive. Letting this scratchy monstrosity cure for a week, hanging in the garage, it mocked me every day as I went out to the car.
One week later... |
So, after the disastrously scratchy metal flake layer fully hardened, you could literally take the skin off your elbow with it. Since to leave it alone would be total failure, I decided to try and sand off the sharp points of the flakes. 220 grit sandpaper and a hard sanding block knocked the sharp ends off the finish. The result was now merely lumpy, not jagged.
I blew the dust off with compressed air and wiped it down with alcohol. Time to try and seal it all up with lots and lots of clearcoat. It sure couldn't get worse.
 |
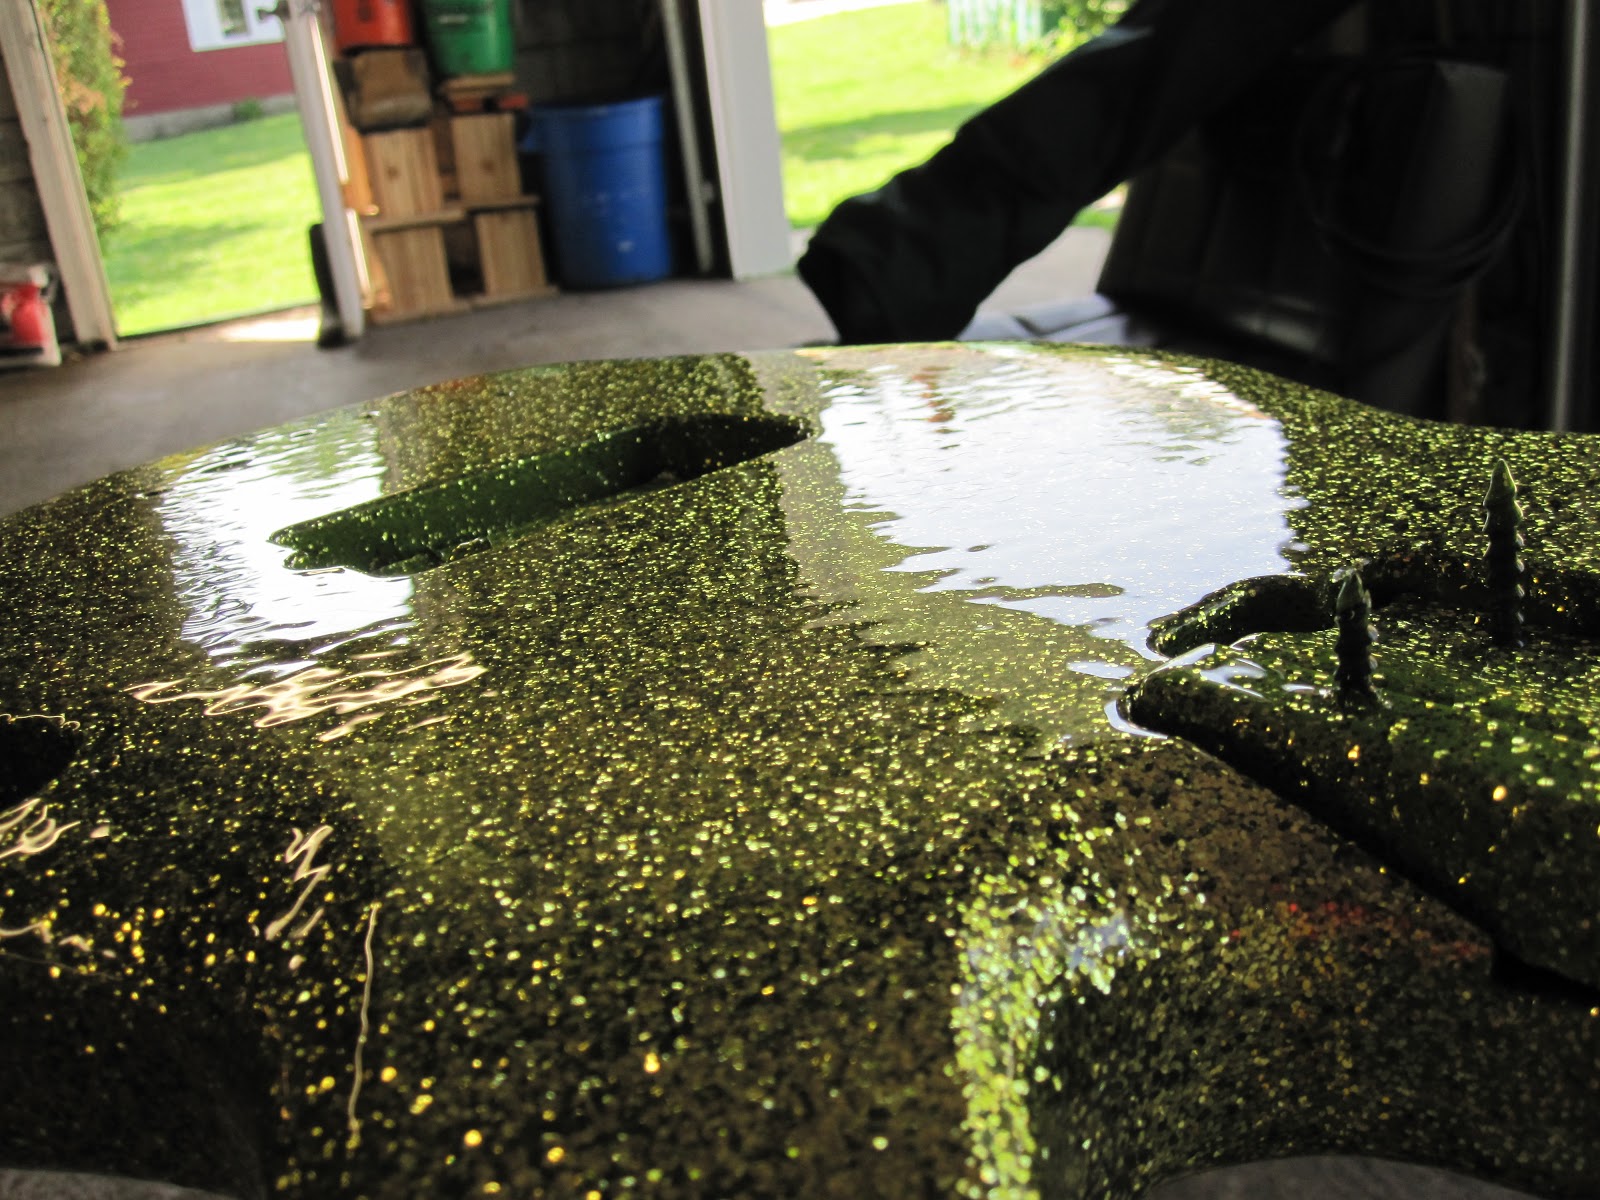
| The clearcoat was starting to smooth out the jagged mountainscape of the now-dried previous layer of clear and flake. This photo was taken after two coats of clear, with each coat added fifteen minutes apart. With he light at the proper angle, you can see if the paint is flowing together, or if the droplets are standing separately, creating more "orange peel" texture. |
 |
| Photo with three more coats of clear, for a total of five coats. I wanted to try and add more for even better smoothness, but since the car paint shop guys said I wouldn't need more than two coats, I didn't want to push it too far, and thereby create even more problems. What kind, I don't know. Bubbling? Dripping? Foaming? Since I was already off the prescribed path, I chose to err on the side of caution and leave well enough alone. |
One week passes...
 |
| Wetsanding. "What's that?" you say? That's when you use a special kind of sandpaper (with a bit of cloth in the backing instead of just paper) that can be used while soaked in water. The water keeps the grit in the paper from filling up with powdered material, so the paper doesn't become useless quite so fast. When sanding clearcoat, conventional wisdom dictates that you use something very fine, like 600 grit. However, I still have some pretty big waves to flatten, so this is 220. (Think of grit like pixel resolution. 220 grit has 220 grains of abrasive per square inch. 600 has 600 grains of abrasive resolution, etc etc. So, 600 is finer than 220. Yeah, you get it. |
 |
| After the big waves were mostly flattened out, 600 was used. I was afraid of sanding too far, and going through the clearcoat, ruining the project (again). So, there are still waves that remain, but considering the disaster that was averted.... not so bad. |
 |
| After 600 grit sandpaper, polishing with a cotton wheel and some buffing compound... for about two hours. Soon after taking the picture, I got wise and stuck a little magnetic shop light to the fender of my dad's bike, there. That bounced light off the surface at the right angle to let me see the progress of the surface shine. |
 |
| Holy crap, this might actually turn out sort of okay. |
 |
| My dad's collection of knobs, collected over a career as an automation engineer in the 1950s and 1960s. So many cool ones. Thanks, dad! |
Having poured more hours and money into a $300 bass than it deserved. I could easily, at a later date, upgrade the pickup, pots, and other electronics to the level of an actual Music Man Sting Ray, whose parts are pretty much a direct swap to those of a Music Man S.U.B. Sterling. Not today, man.
 |
| Bass complete! Open the player menu to level up and assign skill points. |


